Measurements with the use of advanced oscilloscope features
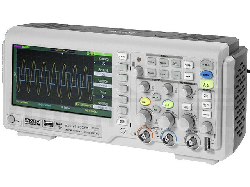 Modern digital oscilloscopes do not only display waveforms of electric signals in time. Advanced features of measurement devices allow you to conduct fast and easy measurements of signal parameters and run diagnostics.
In this article, we are presenting ways of using the advanced features of the AX-DS1100CFM oscilloscope from AXIOMET.
There are several types of measurement used mostly in diagnostics, which can be automated in full or in part by modern oscilloscopes. These functionalities are good to know, as they can facilitate work.
Automatic measurement of signal parameters
Let’s assume that we want to know the basic parameters of a periodic signal on one output. The AX-DS1100CFM oscilloscope from AXIOMET has a feature of smart, automatic adjustment against connected signals. After pressing the AUTO button, the device detects outputs with signals and adjusts the display mode in such a way to present the waveforms in the best possible way.
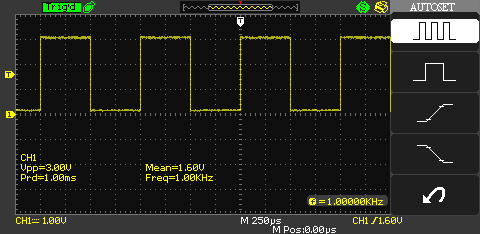
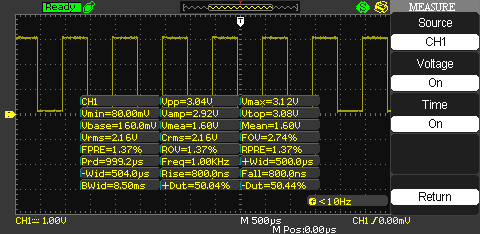
In case of connecting a 1kHz square signal to the first input, with the amplitude of 3V, and pressing the AUTO button, the oscilloscope will automatically set the vertical scale to 1V and the horizontal scale to 250µs. It calculates average voltage, period, amplitude and frequency of the signal, and displays the data on the screen, below the chart presenting the waveform over time.
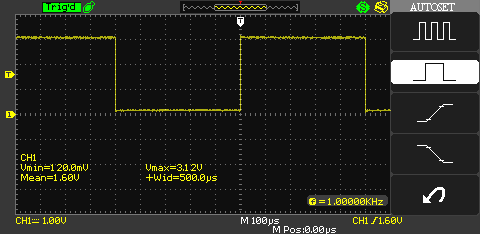
If you want to measure the exact parameters of a single signal period, choose the second option in the right-hand menu. It will set the time scale to 100µs, and the values measured are minimum voltage, maximum voltage, average voltage, and the width of the impulse.
Frequently, the measured subject is the time of rising or falling edge of a signal. Modern oscilloscopes also conduct this measurement automatically – in case of the AX-DS1100CFM model, it is done by selecting the third and fourth menu option for automatic measurements. The device presents calculated rise time and signal amplitude.
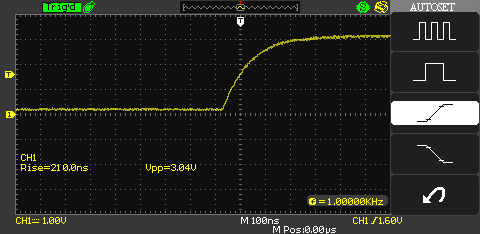
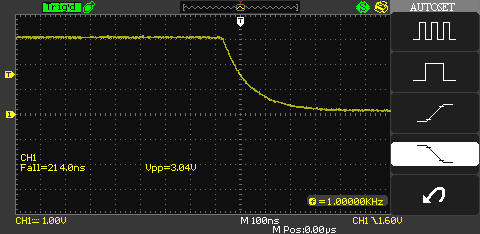
Modern oscilloscopes can also automatically calculate many other signal parameters — you simply need to choose appropriate menu options.
Detecting irregular phenomena
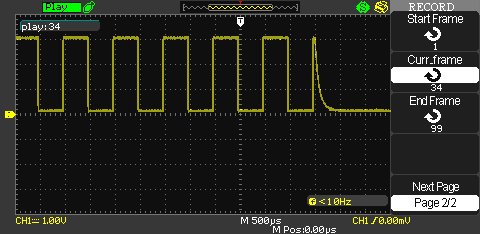
A very handy feature of oscilloscopes like the DS1100CFM model from AXIOMET is storing waveforms in memory. Let’s assume that an inspected device acts inappropriately from time to time, but we cannot predict when it is going to work like this or what triggers such operations, which would allow us to register the very moment in the single-shot mode. In such a case, sample register becomes helpful. In the DS1100CFM model, the user can record signal and save it in the internal memory. You simply need to select the source channel, sampling interval and the number of samples to be registered, and press the register button. Interval can be set from 1ms to 1000s, and the number of samples stored cannot exceed 2,500. This means that you can precisely inspect 2.5s of a waveform, or you can perform a waveform dump every 16 minutes during a period of a month.
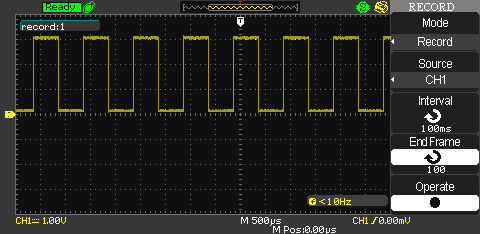
When waveforms are registered, you can view them manually or play automatically.
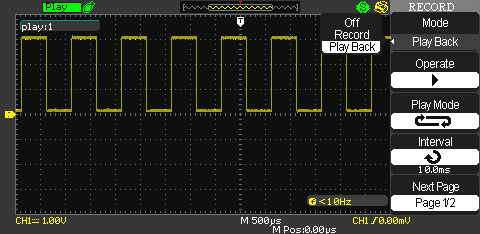
In our case, you can see a sudden signal loss in frame 34.
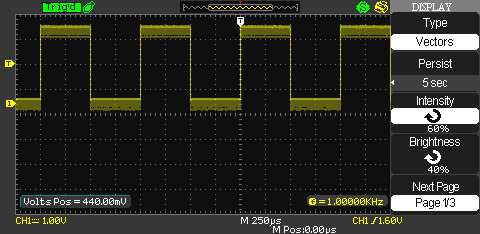
Another way of diagnosing anomalies is to enable signal persistence. Thanks to that, the signal displayed on the screen will leave a trace visible for a certain period. It’s a bit similar to working with phosphor in CRT oscilloscopes that stays illuminated for a short time after excitation with a highly intensive beam and leaves a trace. In digital oscilloscopes, this effect is generated artificially, which means that the illumination time can be set to 1, 2, 5s or indefinitely.
Reference waveforms and auto-testing
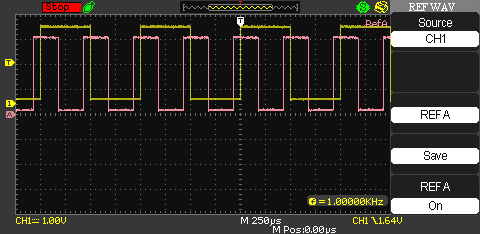
Yet another comfortable way of analysing waveforms is storing reference waveforms. A captured waveform can be stored in the built-in device memory, and then statically displayed on the screen together with waveforms from channels 1 and 2. It allows the user to directly compare them against each other.
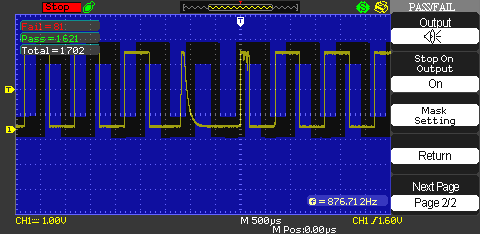
A way more advanced feature, offered by oscilloscopes like the AX-DS1100CFM model, is automatic testing. The device allows you to define a mask for a registered waveform, which it has to fit. It is done by defining upper and lower threshold and the width of the impulse. In oscilloscopes from AXIOMET the mask defining process is significantly simplified, and with the use of buttons and knobs, you can prepare masks for periodic signals.
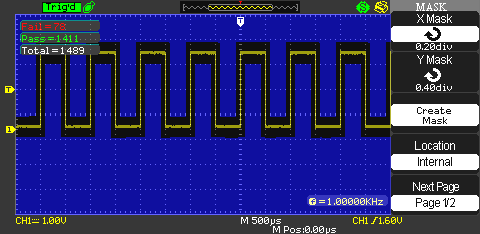
The automatic testing process can be configured as well. The oscilloscope can emit sounds at each waveform that falls outside of the mask, or it can freeze such waveform on the screen. Also, the number of successful and negative tests is calculated, and the current test result is delivered to the output at the back of the oscilloscope.
Summary
Thanks to these features, the work of a designer or a service technician becomes far easier. Therefore, when purchasing an oscilloscope, choose a model that – while staying within the budget – can conduct advanced digital measurements.


